Linux下环境配置
Miniconda安装
这个非常简单,直接去官网下载shell脚本,然后安装即可,记得使用conda init初始化bash,这样每次登录shell就会自动进入conda环境…
源配置
pip源配置
pip config set global.index-url https://pypi.tuna.tsinghua.edu.cn/simple
conda源配置
选取北京外国语大学的源(清华源有的时候会卡,不过北外的源也是清华维护,不知道是什么原因):
channels:
  - defaults
show_channel_urls: true
default_channels:
  - https://mirrors.bfsu.edu.cn/anaconda/pkgs/main
  - https://mirrors.bfsu.edu.cn/anaconda/pkgs/r
  - https://mirrors.bfsu.edu.cn/anaconda/pkgs/msys2
custom_channels:
  conda-forge: https://mirrors.bfsu.edu.cn/anaconda/cloud
  msys2: https://mirrors.bfsu.edu.cn/anaconda/cloud
  bioconda: https://mirrors.bfsu.edu.cn/anaconda/cloud
  menpo: https://mirrors.bfsu.edu.cn/anaconda/cloud
  pytorch: https://mirrors.bfsu.edu.cn/anaconda/cloud
  pytorch-lts: https://mirrors.bfsu.edu.cn/anaconda/cloud
  simpleitk: https://mirrors.bfsu.edu.cn/anaconda/cloud
Pytorch安装
如果想要获取炼丹环境,使用anaconda安装cudnn/cuda是个很好的选择!
然而现在的nvidia/linux-64的官方anaconda源在国内的速度为0,为了切换为国内源,需要额外添加一个源:
nvidia: https://mirrors.sustech.edu.cn/anaconda-extra/cloud
我的.condarc是这样的:
channels:
  - defaults
show_channel_urls: true
default_channels:
  - https://mirrors.bfsu.edu.cn/anaconda/pkgs/main
  - https://mirrors.bfsu.edu.cn/anaconda/pkgs/r
  - https://mirrors.bfsu.edu.cn/anaconda/pkgs/msys2
custom_channels:
  nvidia: https://mirrors.sustech.edu.cn/anaconda-extra/cloud
  conda-forge: https://mirrors.bfsu.edu.cn/anaconda/cloud
  msys2: https://mirrors.bfsu.edu.cn/anaconda/cloud
  bioconda: https://mirrors.bfsu.edu.cn/anaconda/cloud
  menpo: https://mirrors.bfsu.edu.cn/anaconda/cloud
  pytorch: https://mirrors.bfsu.edu.cn/anaconda/cloud
  pytorch-lts: https://mirrors.bfsu.edu.cn/anaconda/cloud
  simpleitk: https://mirrors.bfsu.edu.cn/anaconda/cloud
-
创建新的anaconda环境:
conda create -n "pytorch" python=3.8创建新的环境有利于我们更加合理的管理包之间的依赖,防止包之间的环境污染
-
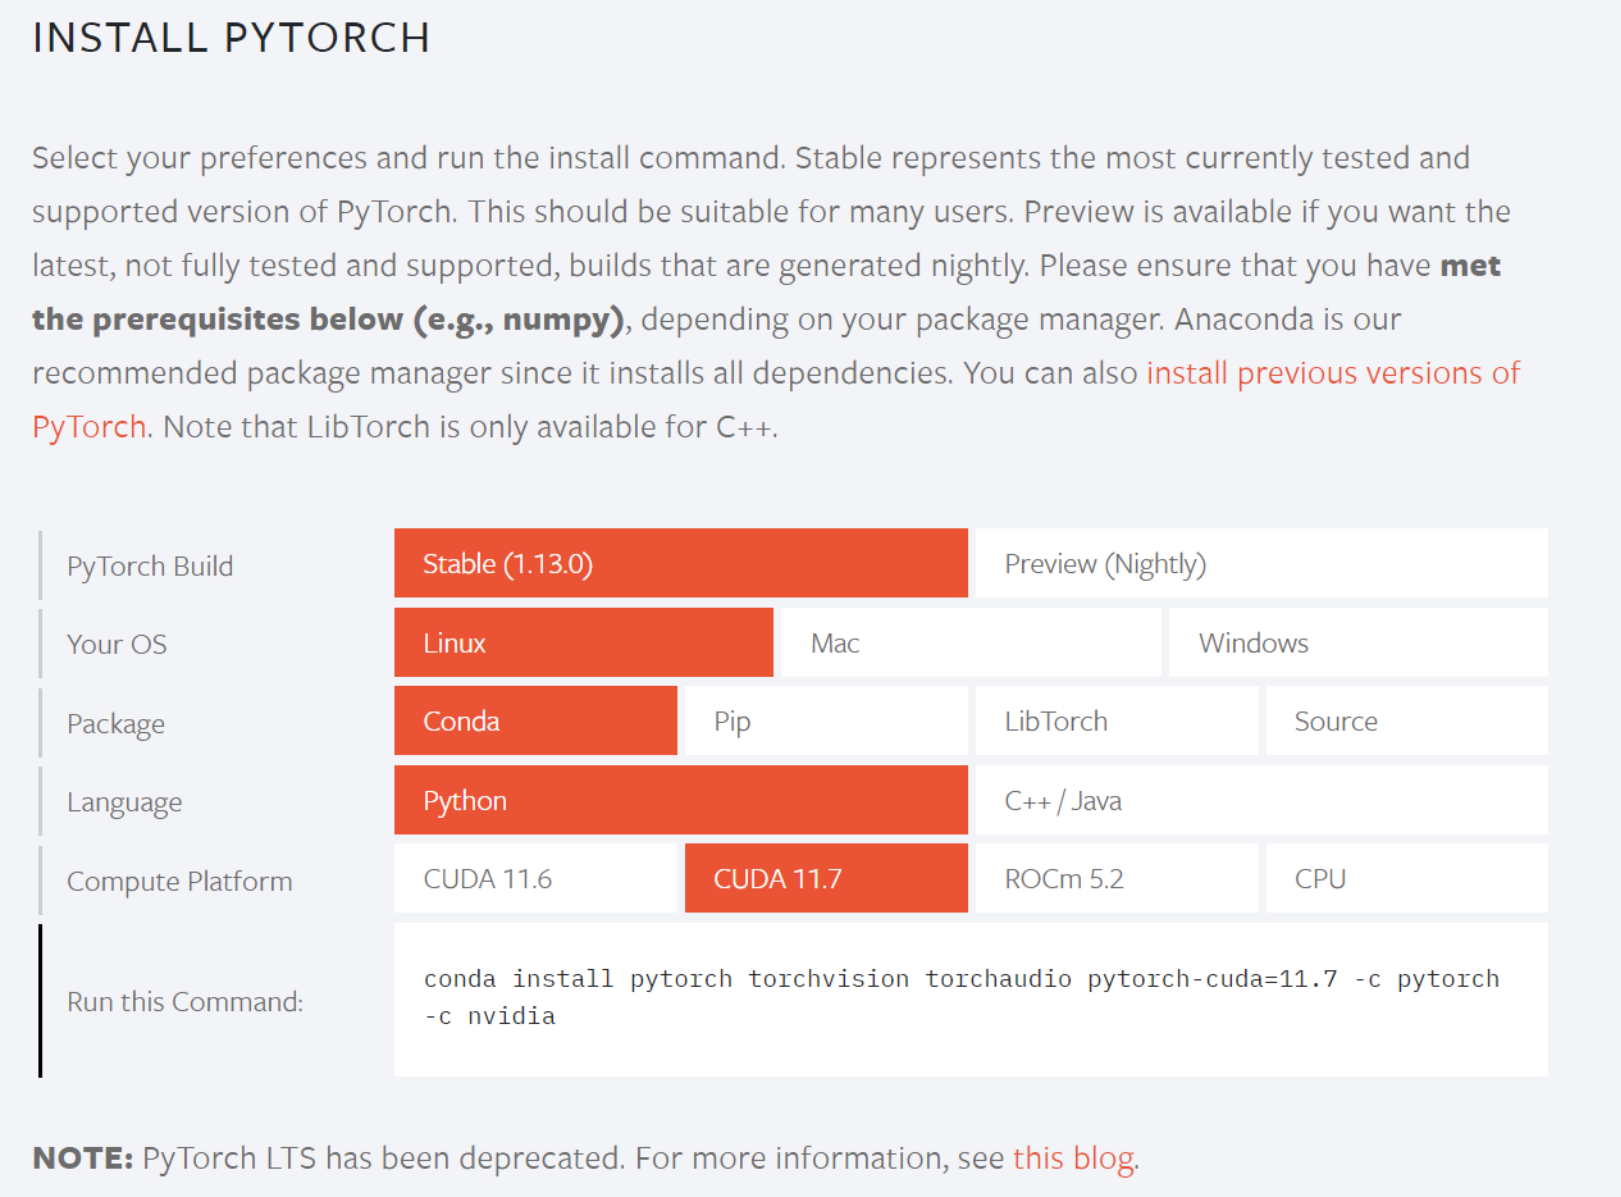
进入pytorch官网:PyTorch
 选择合适的版本,并复制命令行,例如在我的电脑上安装的命令为:
conda install pytorch torchvision torchaudio pytorch-cuda=11.7 -c pytorch -c nvidia
Java安装
-
配置环境变量 根据使用的shell进行配置,例如:使用bash就用
vim ~/.bashrc配置,使用zsh就使用vim ~/.zshrc配置 配置的变量如下:export JAVA_HOME=/usr/lib/jvm/jdk1.8.0_202 export JRE_HOME=${JAVA_HOME}/jre export CLASSPATH=.:${JAVA_HOME}/lib:${JRE_HOME}/lib export PATH=${JAVA_HOME}/bin:$PATH -
重新打开终端或者执行
source ~/.zshrc进行刷新 -
执行
java -version,如果出现如下的语句说明配置成功
zsh配置
- 使用命令
chsh -s /bin/zsh,更换当前的 shell(需要重新启动生效) - 查看当前的 shell:
echo $SHELL